


RAoK/SAoB: the Random Acts of Kindness and Senseless Acts of Beauty Task 2 by lucid city, al chemy
July 14th, 2006 9:46 PMdull.
drab.
gray.
brown.
forgotten.
unnoticed.
spaces.
AND, we were lucky enough to be able to borrow lucid's co-worker's camera for the night to document the whole process. (he liked it, which was a surprise to her!)
here's the recipe:
1. get some tracing paper, water proof markers, scissors, corn starch, a cheap paint brush, a jar with a tight fitting lid, a spoonfull of sugar... (seriously)
2. draw on the tracing paper. whatever you want. we had our locations in mind prior to creating the drawings, so we made drawings specific to the sites we had in mind-- we wanted them to interact with their locations.
3. cut out your drawings.
4. make wheatpaste:
4.1mix 4 tablespoons of cornstarch into just enough cold water to cover. mix well, so that there's no lumps
4.2 bring two cups of water to a boil
4.3 drop the water down to low and add in the cornstarch/water mixture slowly, stirring the whole time (we used an eggbeater)
4.4 simmer the mixture for about 20 minutes, until it thickens and turns from milky white to slightly more translucent (ours looks a bit milky still because of all the air bubbles mixed in by the eggbeater)
4.5 stir in the spoonfull of sugar, for extra sticking power
4.6 let the mixture cool
4.7 if there's clumps in your wheat (corn) paste, strain it. we strained ours through a tea strainer
4.8 pour into a jar, screw on the lid and you're ready to go
5. while your wheatpaste is cooling, roll your drawings into cylinders, from TOP TO BOTTOM (see the photos)
6. head out to your site, with all your supplies (we did this at about 1am, but sometimes broad daylight is best-- no one expects it)
7. when at your site, coat the entire area you want to beautify with the wheatpaste
8. take your drawing, which you have rolled into a cylinder and place the bottom of the drawing where you would like it to be
9. unroll the drawing
10. take the brush and lightly go over the surface of the paper to coat is with a thin layer of wheatpaste.
11. leave the scene
so we did this a couple of times. check out the photos and the text that goes with them for visuals and more narrative. (for security reasons we did not take photos our ourselves in the act, and returned in the morning to take the after shots.)
blurry before

bad blurry photo of a boring place. we decided not to take any more bad blurry photos, for our own sake. ugh
the drawings

three drawings, for three boring places.
making wheatpaste

blurry egg beater blends the brew.
wheatpaste is done

(the flash makes it look falsely whiter than it was)
the goods

our supplies: wheatpaste, brushes, drawings rolled into cylinders
site 1

this is going to be so much fun to pass every day on the way to work....
site 1

closer up
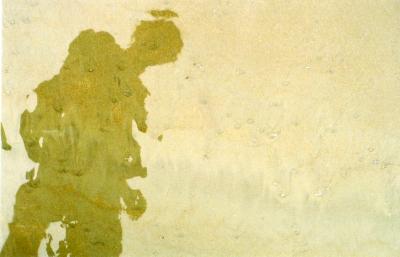
the chicken flew the coop!

went to where we left the chicken, so peaceful last night and it was gone! DAMN!
chicken caught again

i found it crumpled on the ground, looking pitiful. but never fear-- the chicken will return! in a better site, too. maybe tonight? (stay tuned for the chicken's journey)
site 3

the boring bridge, with a bit of newly added spice. (along with whitenoise, we plan to take full advantage of the blank canvas that is this bridge by the end of summer. never you fear-- it shall be colorful soon.)
closer up

and closer still

can you imagine a whole bridge of fun installations? we can.
7 vote(s)

Ink Tea
3
not here
3
ambitron indifornian
3
spotlight skullshines
5
Blue
5
Lank
5
Rev. Giggles McGee
Terms
(none yet)4 comment(s)

I don't know exactly why, but I really like this a lot.

its better as tracing paper because the natural colors of its surrounding show through, right?!?!
thanks for the recipie, this chef needs to get cookin.

one benefit (sometime drawback) of tracing paper is that you can see through it in areas that are not colored in.
when choosing paper, keep this in mind:
the thinner the paper, the better.
the mroe porous the paper, the better.
so, the papers that work the best are newsprint and tracing paper.
sorry some of the photos are sideways. it's driving me crazy, but i can't figure out why they're like that. i'll change them soon, i hope. for now you can just turn your heads instead.