


Document A Construction by Lizard Boy
February 10th, 2008 11:20 AM / Location: 37.710064,-122.0840Finally!
I spotted this task when I first joined SF0. You see, I love making things (Hence the "make things go" part of my six-word description of my life). My profession involves making machines, ideas, methods, algorithms, and the like. My hobbies include making music, friend, props, sets, and blanket forts. How could I pass up this opportunity to create something for SF0?
Previous Ideas (or: you can skip this if you want)
Of course, the biggest problem, the thing that kept me from completing this before now, is that I didn't want to do the first thing that I could. How could I represent one of the biggest parts of my life in SF0 with something lame, like a series of photos of the folding of a paper airplane?
First I wanted to deconstruct and then reconstruct a mechanical adding machine, to complete the two parallel tasks. After getting the cover off the adding machine, however, I realized that it would take...weeks of solid work, hundreds of hours at least, even if it was possible at all to do by hand. So I, regretfully, abandoned that idea. I've included some pictures of that at the end of the praxis, just because I think it's very interesting.
Then I had the idea of adding a substantial loft to the lounge of my dorm, utilizing its copious vertical space. I got to the point of having plans, and almost ordered wood for it. Unfortunately the school decided at the last minute that it couldn't allow that, for liability reasons. It will be nice to not have anyone liable for my safety when I graduate...
After that I floundered without ideas for a while. Then, over winter break, I noticed three things. A problem, a solution, and that I had free time. It was time!
The Conception
I have a dizi. A dizi is a pretty cool traditional Chinese bamboo flute. One of my friends got it for me several years ago, but I never did learn to play it well. One of the reasons for this is it's hard to transport. It doesn't have a case, and in order to have it play nicely (instead of sounding like a piece of PVC with holes drilled in it), it needs a couple easily lost peripherals, a particular kind of membrane, and the stuff you use to stick the membrane on. I lost the membranes my friend gave me, and never found others.
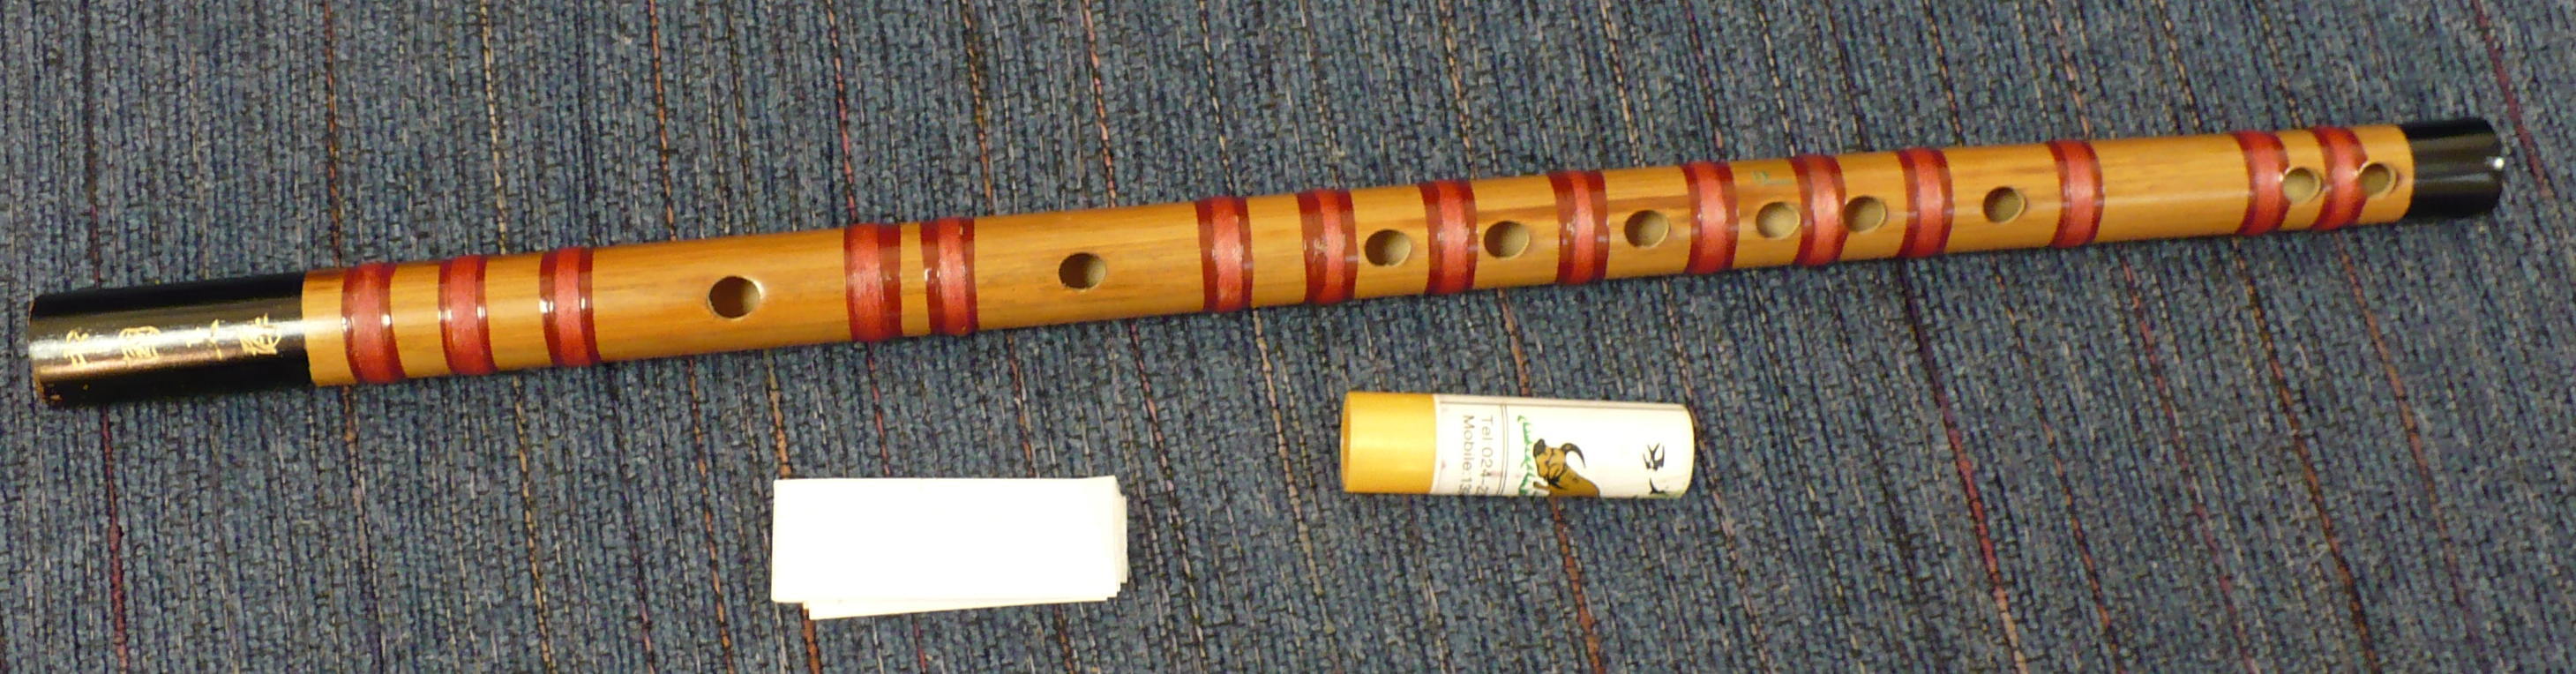
A dizi (the flute), with dimo (membrane, inside the folded paper) and e jiao (hard glue-ish stuff, in the plastic tube).
But wait! All three of these problems could be solved with a case to transport them together. It would protect the dizi, and keep everything together. To cement myself in this task I ordered the dimo and e jiao, and started practicing fingerings.
The Construction
I'm lucky to know my father. He is an incredibly skilled man, and, among other things, carves a fair amount. Let me acknowledge right now that he helped me throughout this task by providing advice and tools.
One thing I knew from the beginning is that I wanted this to be classy. If I was going to make a case I was going to do it RIGHT, and nothing would get in my way. I wanted to come out of this with something I could be proud of, that I would show to my friends and go "Look! I made this! Isn't it awesome?". Several decisions were made based on that. I wanted a high-quality wood, even if it was harder to carve. I wanted to finish it somehow (oil, lacquer, stain, whatever). I wanted to line the inside, probably with velvet. As I worked on it the final vision of what it should be played out, and almost every time there was a choice, I took the one that I thought would look more...professional.
The rest of this will be documented as captions in the pictures below.
36.JPG

A good picture for the praxis page.
1.JPG

The first thing to do is make a proof-of-concept. If it ends up being ridiculously hard to make a case for something round, I need to figure out a good way to do it before starting on the final product. So I made a "case" out of some blocks of pine for this screwdriver.
2.JPG

The tools I used for this. By the way, if you're cutting cross grain with a chisel, and your thumb is above the edge of the wood in the direction you're cutting, try not to slip. Chisel wounds bleed fast.
3.JPG

And...
4.JPG

It worked! Time to start on the real thing. (By the way, I would have given these creative names, but I wanted to preserve order in the folder I took them from.)
4a.JPG

The workshop. Against the wall is a dizzying array of wood. I picked a plank from it based on what was soft enough to carve, hard enough to be sturdy, and looked nice. Final verdict: walnut. The biggest problem with this workspace is that the work bench is about hip height. My back complained at me a LOT for cutting walnut with a gouge (requires no small force) while bent almost completely over.
5.JPG

The first cuts. You use a chisel with a rounded edge to cut down about 1/8" from the desired end, then cut either away from it or towards it, depending on the orientation of the grain.
6.JPG

Working on the slot for the dizi. It amazed me how much there was to balance in making these cuts. For example...
8.JPG

...this is what happens if you are cutting such that the grain locally angles deeper into the piece you're cutting. It splits instead of cutting.
9.JPG

The first slot is done! The work you see there probably took me...7 or 8 hours. Apparently this is what I get for learning while I work.
10.JPG

The second slot is done! This one took less time, but I don't know exactly how much less. It feels nice working on something physical and not too thought-intensive. Relaxing. Sorta like painting.
11.JPG

And there are the smaller holes, for the e jiao and dimo. This is the array of tools I had used by that point, in trying to get the smaller radius for the e jiao and the interior corners for the dimo.
12.JPG

One of the scariest parts of this whole process. This is the inset for the hinges. Set them too high, and there will be a gap between the boards when they're closed. Set them too low, and the case just won't close. Additionally, the barrels need to line up exactly along the same line, or they just won't work.
13.JPG

Not half bad! Looks like the depth of that slot is right.
14.JPG

Not quite far enough into the board yet. The center of the barrel should line up exactly with the corner of the wood.
15.JPG

The location for this task (the workshop), looking like a scary monster at night. It gobbled up both me and my time!
16.JPG

Hinge slot carving done, time to sand. I sanded them clamped together so that the edges would match up. It surprised me how much sanding this took. I had to get things like sawblade marks off the ends, and some of the edges were off by as much as 1/16" or so. Doesn't sound like much, but when you're going at hardwood with sandpaper it takes a while.
17.JPG

OILED! SHINY! They look so pretty! My babies... I get so excited when I see things I'm making looking really *nice*. I went for oil instead of another finish because the wood had such a nice natural color to it. Stains can look really nice, but they also often end up looking fairly artificial, which just doesn't appeal to me as much. I was also apprehensive about messing up a lacquer and leaving large streaks across the body.
18.JPG

Comparison between the oiled surface and the unfinished cavity. I didn't oil the part I was going to line because my dad pointed out that wood glue doesn't bind as well to an oiled surface.
19.JPG

Getting ready to glue in the velvet. I just now noticed that this shot also represents three generations. I made the case, my father put together the puzzle, and his father made the table. (My dad totally got the shaft in his representation, he could out-crafty me any day of the week.)
20.JPG

I went with red velvet because of a few things. 1) It just looked nice. 2) It matched the red bindings on the dizi. 3) The wood tones have just enough of a golden hue to them to hearken to the red-gold combination that I thought would be so appropriate for housing a Chinese instrument.
21.JPG

Precision application tools.
22.JPG

First half lined. I went back later with a matte knife and cut off the excess. That turned out to be remarkably hard; velvet is strong and stretchy.
23.JPG

In the middle of this I had to pack to go back down to school. These are the hinges and screws I had. I may or may not be slightly OCD.
24.JPG

A neat package.
25.JPG

At school I realized that I couldn't actually drive the screws in without predrilling holes first. The drill press may have been slight overkill, but I didn't have a hand drill motor.
26.JPG

This is the starter bit, necessary so that the drill bit doesn't flex to the side when you start a hole. You need to go in with the drill bit in exactly the same place as you started with the starter bit. This means you need to alternate between starter bit and drill bit, rather than doing all of one first, then all of the other. Not the starter bit's width.
27.JPG

And note the drill bit's width. There were about 10 full turns of the chuck key between the widths, and the chuck was extraordinarily hard to turn, so I couldn't do it by hand. The tape was a depth gauge. When it started sweeping away the sawdust around the hole, I knew I'd gone to the right depth.
28.JPG

Whoops! This is what happens if you don't tighten the chuck enough.
29.JPG

Hinges!
30.JPG

They work!
31.JPG

Nicely set in the back of the box.
32.JPG

Little tiny nails to be driven in to hold the clasps. I got them pretty much in the right place, but unfortunately each would end up being off very slightly (a millimeter?) in a random direction.
32a.JPG

Do I get bonus points for using a hammer I made myself to drive in the nails?
33.JPG

The box is whole! Unfortunately, because the clasps were very slightly off, they didn't work. See, they're a silly design, that simply has a dome shape on the stationary side, and a circular hole in the hinged side. Because there was slightly too much tension when they were down, it would just pop back up. In order to fix this I filed away a little bit of the material where the clasp rests, making it need to go over a thing that sticks out further to unclasp. The lesson: never make clasps that the "closed" position is not at a local potential energy minimum.
34.JPG

Modified clasp. It worked much better.
35.JPG

The final product. I win! This was really a rewarding project. It taught me a little bit more about how I take on projects, and that I can, in fact, learn while doing. And I made something that I am truly proud of.
36.JPG

The case is now sitting on top of my bookshelf in my room. Hopefully this summer I will take it to camp, and use it as an instrument I can just doodle around on. I'm so classically trained on the western flute that I end up being very uncomfortable without sheet music in front of me, but maybe I can break that trend with the dizi.
Machine1.JPG

This picture and all the ones after this are of the adding machine I briefly mentioned. I include them not because they are relevant to the construction of the dizi case, but because I think it's really cool.

Machine3.JPG

The teeth that rotate the stamps.
Machine4.JPG

On the side of the machine.
Machine5.JPG

Zooming in a little to look inside.
Machine6.JPG

Further inside. No idea what those shuriken-looking things are.
Machine7.JPG

Looking down past the control panel.
Machine8.JPG

That rack of pegs is what stores the current number to be printed.
Machine9.JPG

In the middle of striking.
Dizi.JPG
18 vote(s)

Tøm
5
Jellybean of Thark
5
Darkaardvark
5
teucer
5
Lincøln
5
Shea Wolfe
5
anna one
5
Magpie
5
Flitworth
5
Coreopsis Major Bloden Melen
5
susy derkins
5
JTony Loves Brains
5
Cthulhu Kitty
5
Loki
5
GYØ Ben
5
Sean Mahan
5
lara black
5
The Vixen
Favorite of:
Terms
(none yet)16 comment(s)

And you made a hammer yourself?

Well I had better tools for that: a metal lathe, a wood lathe, a mill, etc.

You can actually change the text above the image without changing the filename - it's the field the filename appears in when you are putting in the caption below it.
Also, I second Plan 9's request for audio.
Alright, I'll try to get an audio clip up in the next day or two.


Oh, I see now that I had been voting way too easily: this is truly vote worthy. Double and triple vote worthy too. Wood. Chucks. Adding machine. Three generations. Chisel wounds. And all that without even looking at the musical context of the dizi. Workshop hat´s off.
Audio clips added. Tape.wav is me playing a short clip with a piece of scotch tape covering the dimo hole, dimo.wav is me playing the same clip with the dimo covering it. I did my best to play in similar style, so most of the difference that you hear is from the different materials (including the volume difference). The clip may or may not be part of an actual song, but I suspect it is my muddled memory of playing the Butterfly Lovers about 7 years ago. The beginning of the actual melody of the Butterfly Lovers is similar, but not the same.
The clips have significant dead time at the beginning and end, because I didn't feel like figuring out how to edit audio clips just to remove a few seconds of silence.
Awesome audio, had I not voted, I would have done now.
The audio sounds really, really cool. Thanks.

Really haunting, sends shivers up my spine. Love it.

Sounds much better with the dimo. Maybe not better, but more authentic.

there are a lot of things that make me want to vote for this, but our shared appreciation for a. flutes b. carpentry and c. ocd organization methods that involve scotch tape are certainly the top 3.
does this proof not deserve the power drill badge that i've been so curiously eying since the start of the era?

Awesome!
The case looks really good, The velvet was a good touch.
Could we have an audio clip of the dizi?